Stripe is one of the most popular ways to sell software, but it has no built-in solution for license keys. Keyforge fills that gap. When a customer completes a Stripe checkout, a license key is automatically generated and emailed to them. Keys are cryptographically signed for offline verification, and customers can manage their licenses through a self-serve portal. No webhooks, no backend, no code required.
This guide covers the full setup for purchase licensing with Stripe, including upgrades, renewals, and the customer portal. If you're selling a subscription-based product, see the Stripe subscriptions guide.
Prerequisites
Before starting, make sure you have:
- A product created in the Keyforge dashboard.
- A Stripe account with at least one product.
Step 1: Connect your payment account
Go to Payment Accounts in the Keyforge dashboard and connect your Stripe account.
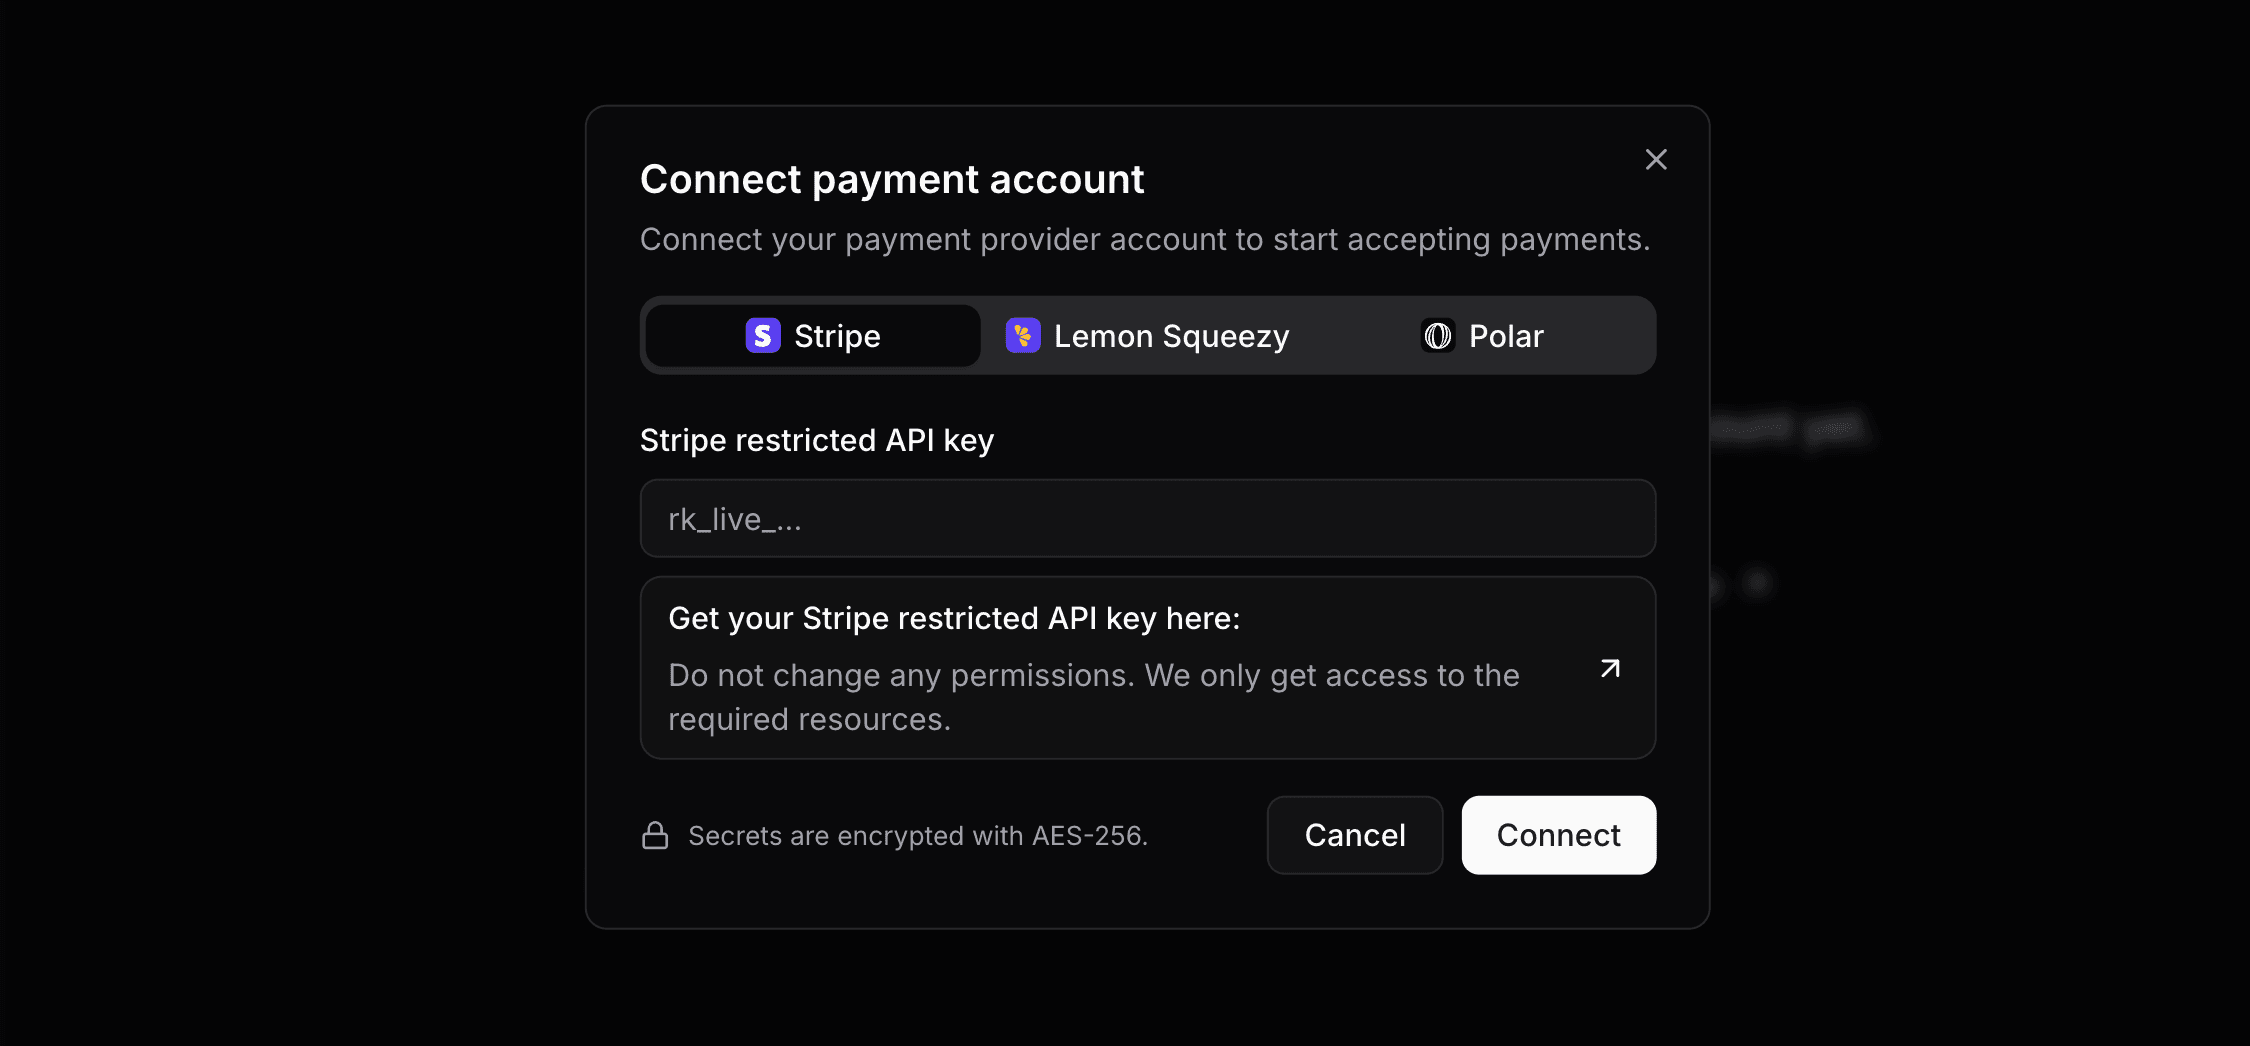
Keyforge uses a restricted Stripe API key with only the needed permissions. Your credentials are encrypted at rest with AES-256.
Once connected, Keyforge automatically configures the webhook endpoint on your Stripe account. There is nothing else to configure on the Stripe side.
Step 2: Connect your Stripe product
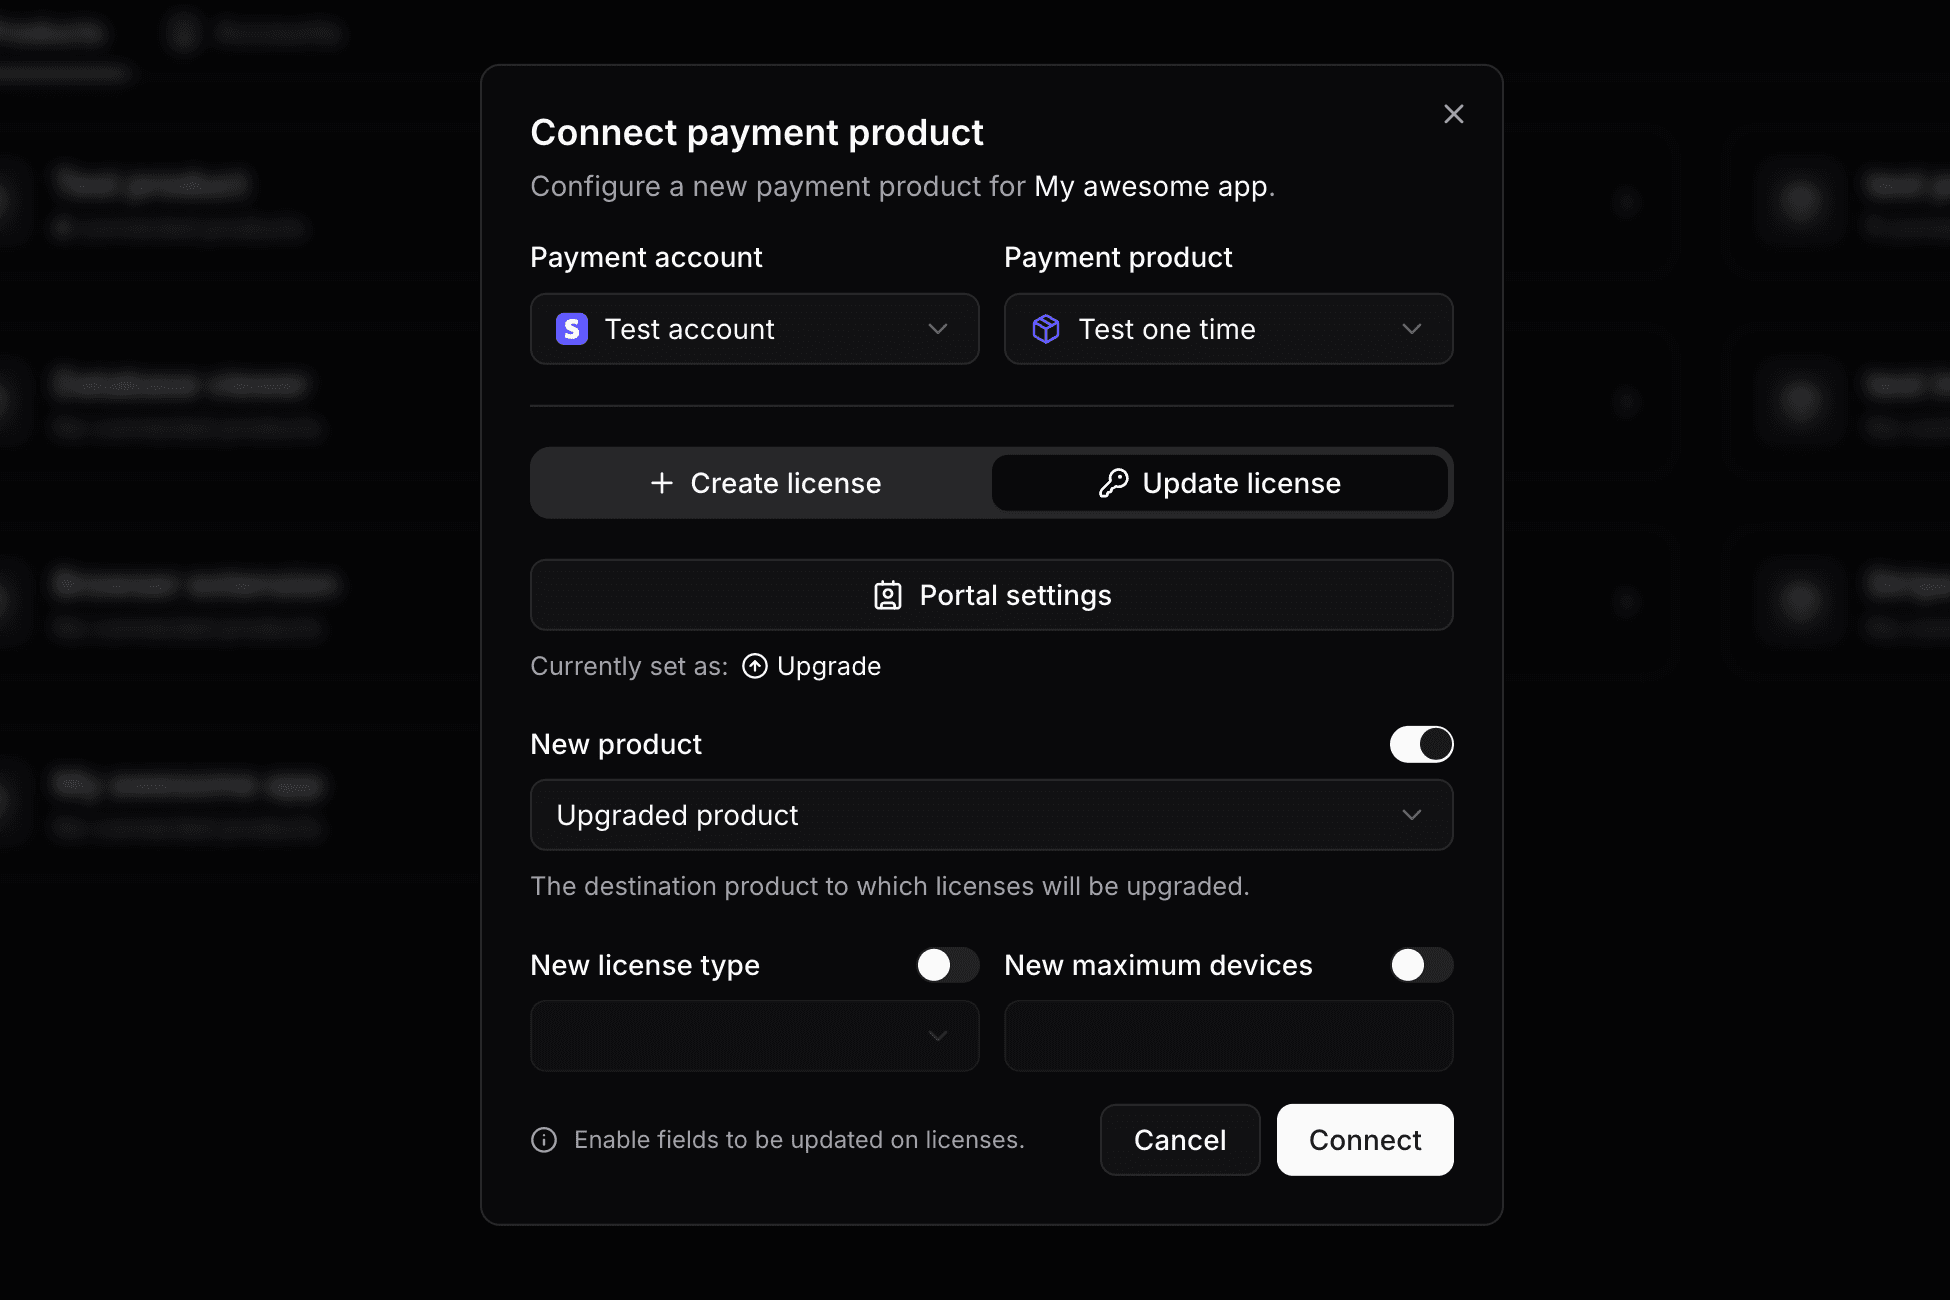
Go to Payment Products and click Connect product to link a one-time Stripe price to a Keyforge product.
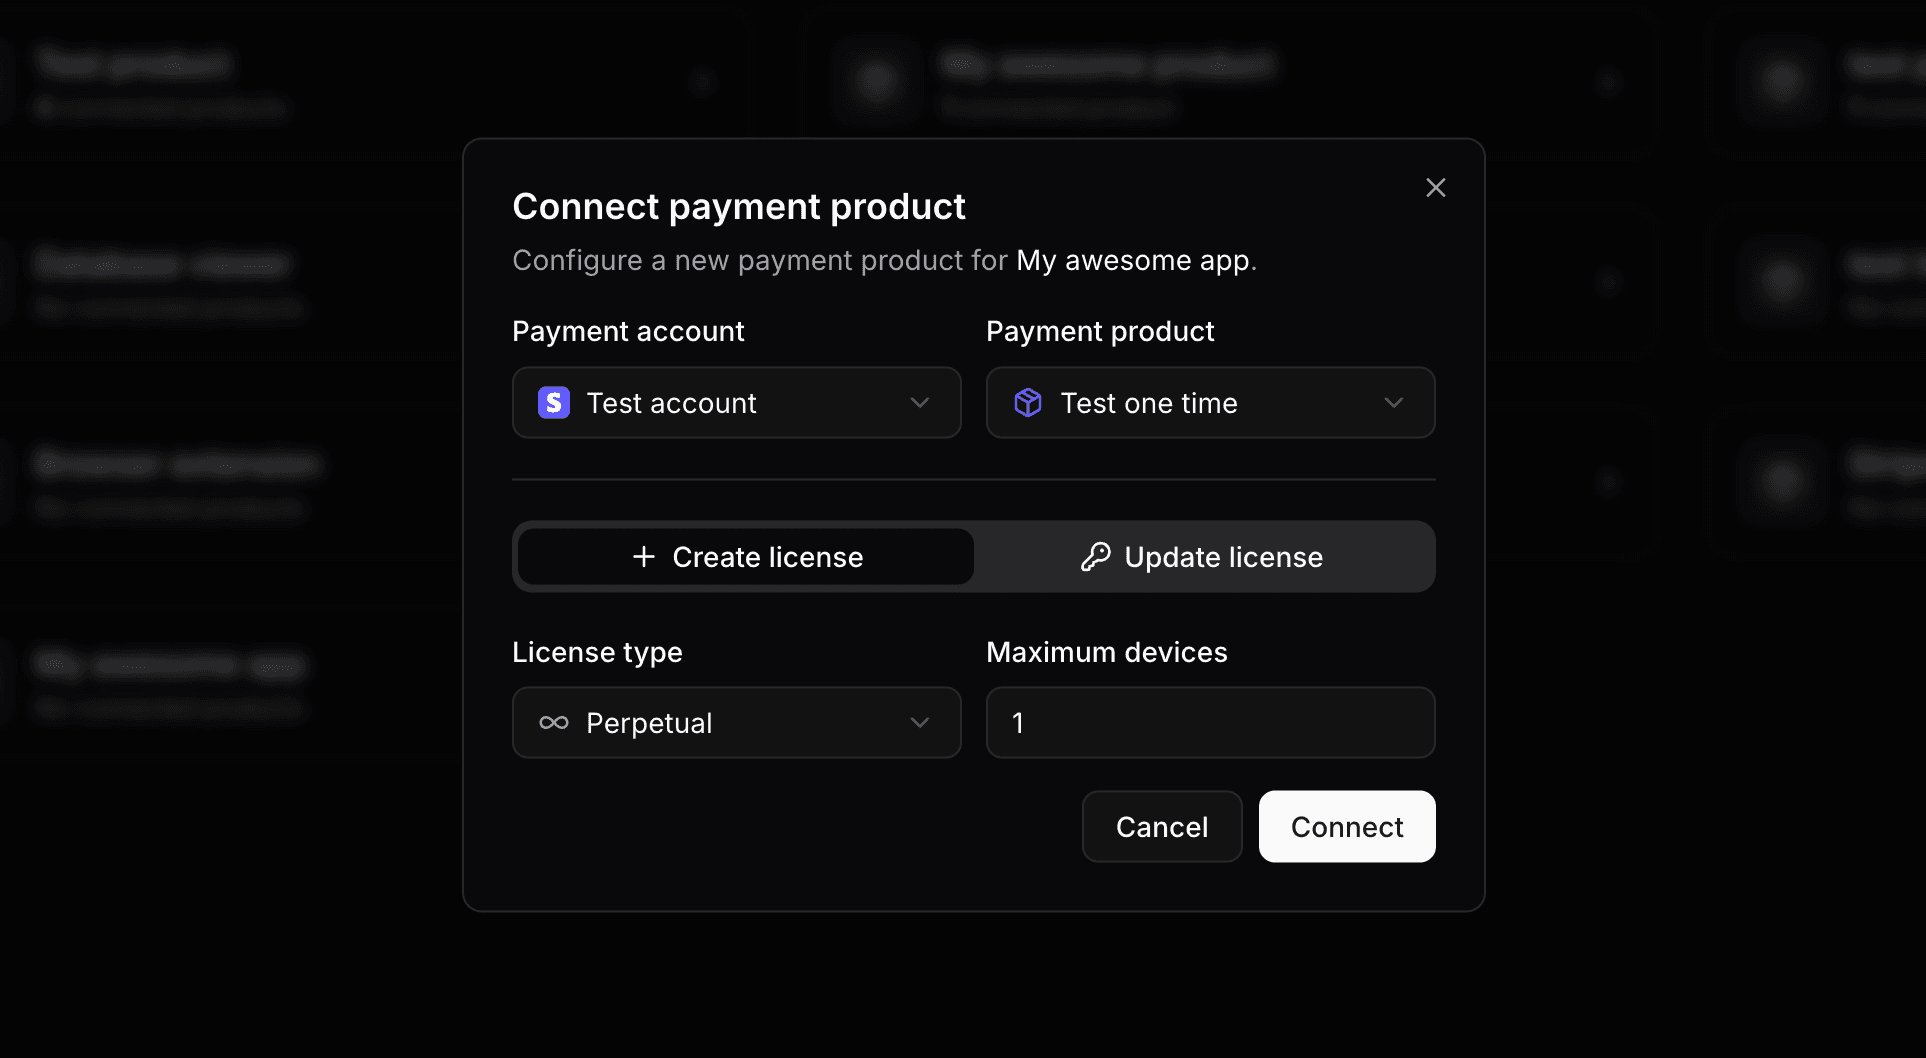
You will be prompted to select the Stripe price and configure how licenses are created for it.
You can configure:
-
License type: the expiration behavior of the license:
- Perpetual: The license never expires. Best for a classic "buy once, own forever" model.
- Timed with offset: The license expires a fixed duration after purchase (e.g., 1 year from the purchase date). Good for annual licenses that start on the purchase date.
- Timed with fixed date: The license expires on a specific date, regardless of when the purchase was made.
-
Maximum devices: the number of devices the license can be activated on simultaneously.
Fixed expiration date
If you choose a fixed expiration date and that date has already passed at the time of purchase, the created license will be immediately expired. Make sure to keep it in the future.
Step 3: Start selling
That is the full setup. When a customer completes a purchase through Stripe Checkout, Keyforge automatically:
- Creates a license key based on your configuration.
- Sends the customer a personalized email with their license key.
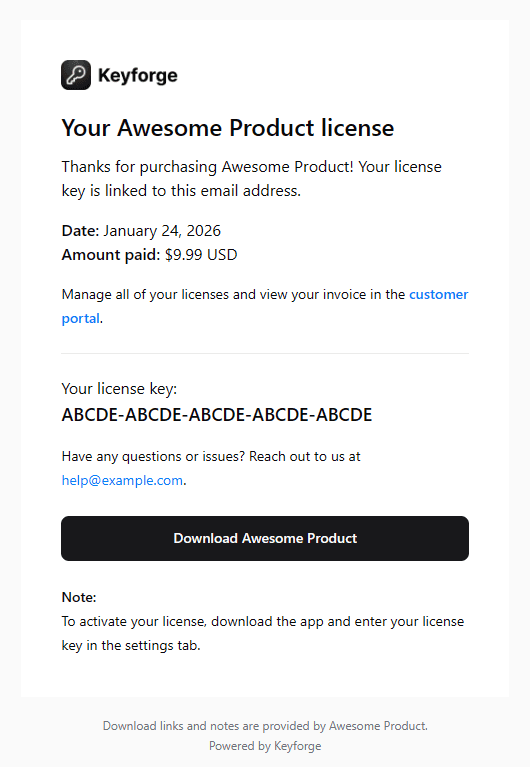
The email is sent to the address the customer provided at checkout. You can personalize it with a thank-you message, purchase notes, and a custom button, which is ideal for linking to a download page or onboarding flow.
License upgrades
If you sell multiple tiers of your software (e.g., Starter, Pro, Enterprise), you can let customers purchase an upgrade directly from the customer portal without any code on your end.
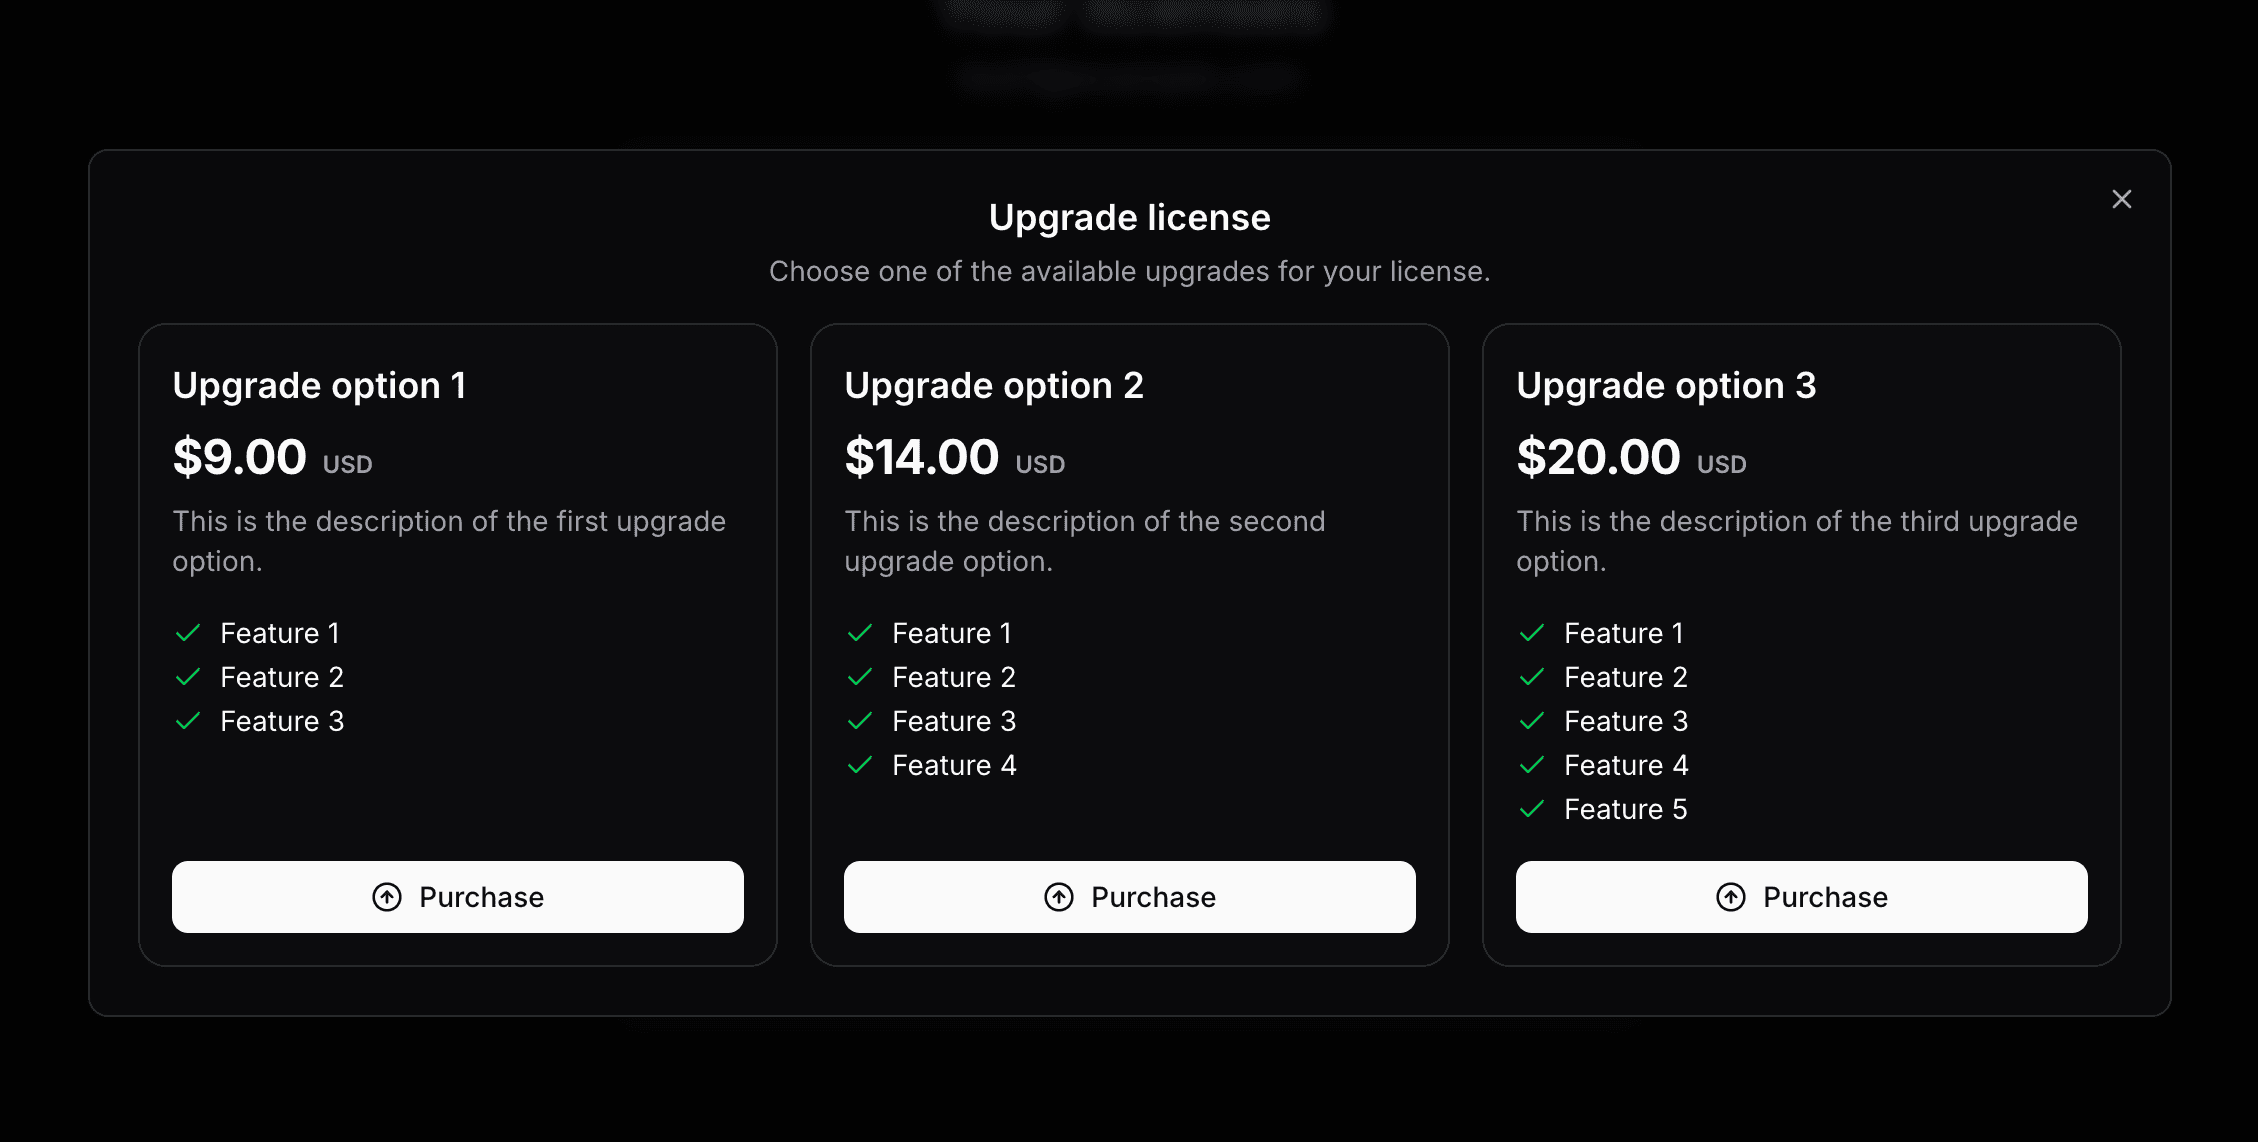
In the dashboard, configure up to 3 upgrade options per product. Each option maps to a different Stripe price, so when a customer purchases an upgrade, they go through a standard Stripe checkout. Once the payment is complete, Keyforge automatically updates their existing license to reflect the new product configuration: new device limit, updated expiry, or whatever changes apply to the higher tier.
This is a straightforward way to grow revenue from existing customers without requiring them to repurchase from scratch.
License renewals
For timed licenses, you can offer customers the ability to renew their license and extend its expiration directly from the customer portal. A renewal extends the license by a defined duration (e.g., +6 months or +1 year). You configure up to 3 renewal options per product in the dashboard.
Renewals are available only to customers with an expired license. When a renewal is purchased, the license is updated immediately.
Pairing renewals with perpetual fallback
Perpetual fallback is a product-level setting that lets customers continue using your app in a limited mode after their license expires, rather than being fully locked out. When enabled, expired licenses have an status of fallbacked.
You decide in your app how to restrict functionality, for example disabling access to new updates while keeping core features available.
const data = await res.json();

if (data.status === 'active') {
  // Full access
} else if (data.status === 'fallbacked') {
  // Expired - grant limited access
} else {
  // Invalid - prompt the user to enter their license key
}
This works well for one-time purchase licenses: customers who let their license expire can still use your app in a limited capacity, giving them a natural reason to renew rather than feeling cut off. It reduces friction and creates a better experience compared to an abrupt block.
Customer portal
Customers can manage their licenses through the self-serve portal at keyforge.dev/portal using just their email address. No account creation is needed. They receive a 48-hour access link by email.
From the portal, customers can:
- View all licenses linked to their email and manage active devices.
- Purchase upgrades or renewals for eligible licenses.
- Download invoices (if invoice generation is enabled in your Stripe settings).
You can customize the portal per product: add a purchase note or thank-you message, include a custom button (e.g., linking to your download page), and control whether customers can reset their own device activations.
What about subscriptions?
If you want licenses automatically tied to recurring billing, expiring unless the customer keeps paying, see the Stripe subscriptions guide. It covers the full subscription lifecycle, automatic renewals, plan changes, seat-based licensing, and how the customer portal delegates subscription management to the Stripe billing portal.
License and distribute your software product with ease
Focus on building your product and let us handle licensing. Manage license keys via payments and give your customers a smooth experience.